Wednesday, February 28, 2007

Metal Thread work : Autumn

MetalThreadAutumn

As the current project has to be one involving metal threads, I thought I would share the work I have done so far on techniques involving these threads. This sample is using goldwork techniques but I decided to use copper tones instead.

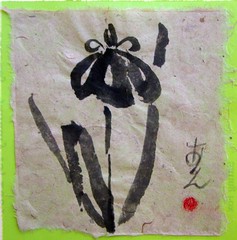
I painted the background using purple silk paints on the same night that I was sumi-e ink painting with Gin. I was thinking of swirling waves and wind at the time. The quick design I sketched out involved leaves and fire which reminded me of autumn.

Friday, February 23, 2007

Work In Progress


I am currently attempting to work on my first finished piece for my course. This has been hampered by my chronic procrastination and, this week, flu. This is part of my design work for the item I am going to produce. The chief requirement for this piece is to execute the design in metallic thread. This includes traditional goldwork methods or less traditional machine embroidery using metallic thread.

It is not obligatory to use my design project in my finished items but it is encouraged. I have chosen my design project to conincide with the finished pieces I intend to complete during the course. The first piece of design for this project, is shown above. The pen and dye drawing is inspired from this piece in the V&A.

Thursday, February 22, 2007

Shibori Results : Stitched

Karamatsu 'larch'

This took a very long time to stitch. If I remember correctly it took the entire length of the film Stigmata which was on the beeb at the time. This particular design is named Karamatsu 'larch', it is composed of alternating rows of consecutive circles. I marked the design onto folds in my sample cloth as a half circle, which I then stitched, gathered and then dyed. I dampened the fabric between stitching and gathering - this would have been better if I had just soaked it after gathering and before dyeing it in its Procion dye bath.

Wednesday, February 14, 2007

Shibori Results : Tied resist

CIMG0485
Ne-maki shibori, thread tied resist, I used small washers to tie into the cloth. Before tie-ing I marked a grid to create an even patterm. This was placed in an immersion dye bath, one of my favourite colour blends - yellow dye with a splosh of blue creating a fresh lime green. This took me a while to tie up (at least 2/3 of The Godfather part 3) but was worth the result.

Honeycomb

In the book I was referring to this technique is called "Honeycomb". This is very effective and more importantly, for a lazy so-and-so like me, very quick to tie. Dampen fabric, roll up with a piece of string, tie string into a doughnut shape, put into immersion bath. Later on unroll and go ooh and ahh at the effect.

Sunday, February 11, 2007

A quickie


I was hard at work this weekend catching up with my pile of college work. Whilst I haven't managed to clear any of the (considerable) back log, I am no longer falling behind. I was just finishing the velvet workshop samples I was working on in Thursday evening's lesson (like the rest of the dyeing day, they will make an appearance). One sample needed a quick injection of colour and I decided to put to use some of the Arty's Quik Color dyes that I have in my stash. As using my existing stash seemed to be a theme of the day I decided to dye a blank silk glasses case that I also found there (I guess it was a bargain in the Rainbow Silks sale). This glasses case is now my new cherished possession as I can now stuff my glasses in my bag at the end of a working day without risking scratches. Its a miracle that they are not scratched to hell and back considering the wanton way I just chuck them into my bag. Hopefully it will make them easier to find now that my bag is so cavernous.

And to think I could have been out getting splattered in mud on a hill in Hampshire.......

Tuesday, February 06, 2007

Shibori Results : Itajime

Itajime 4

This was folded using, what I call unofficially, a quilt fold. I think others refer to this as a flag fold. I clamped the fabric with some useful plastic clips which I got from the local DIY store and then placed the bundle in a dye bath. What you can see is the centre of the fabric, the edges are dyed a little darker and you can see where the clips resisted the dye.


Itajime 3

With this sample I used my trusty protractor once more to fold equilateral triangles, after pleating the fabric into thirds. I painted the dye along the edges, but skipped one of the corners so I was left with a hexagonal pattern.

Itajime 2

This was folded in a similar manner to the previous piece but this time decided on using a different colour from each corner of triangle giving a multicolour star pattern.

Itajime 1

I used the same folding method for the 2 previous pieces of fabric. This time I used silk instead of cotton lawn, I did not dampen the fabric and used two jar lids to create a resist. I like the subtle effect - creating petals which might look nice incorporated with some stitching.

Saturday, February 03, 2007

Happy Birthday

Iris sumi-e

Before Christmas I had a small sumi-e session with G. I was pleased with one or two of my efforts and saved this one for a card. For guidance I used this excellent book the author led the workshop I attended last September. This card should, by now, be gracing the mantelpiece in my Mother's house for her birthday, I hope she likes it (as well as the gift that my sister's and I clubbed together for - thanks H). This time I believe I have the kanji symbols for my name the correct way up. The artist's finishing mark is usually made by a small printing block personal to the artist, as I haven't carved one for myself (yet) I used my little finger. In a way I have carved it myself ......

Anyway Happy Birthday Mum - now go do something fun - and forget about (for a least one day) geriatric care in Mid-Kent.

Related Posts Plugin for WordPress, Blogger...